How to Organize Kitchen Drawers: A System That Stays Neat for Years
Kitchen drawers become junk drawers by default. This guide shows you how to turn them into organized, functional storage with the right dividers, the right categories, and one key decision that most people skip.
By HomeLogicWorld Editorial
Updated September 15, 2026
The Drawer Problem
Kitchen drawers accumulate clutter faster than almost any other storage space in the home.
The reason is structural: drawers are flat, undivided boxes that offer no visual cues about where things belong. Without a system, everything ends up mixed together.
The fix is not just buying drawer dividers. It is deciding what belongs in each drawer before organizing it.
Step 1: Audit What You Actually Have
Empty all your kitchen drawers at once. This feels disruptive, but it is the only way to see your full inventory and make good placement decisions.
Sort everything into categories on the counter:
Everyday cutlery: forks, knives, spoons, and teaspoons
Cooking utensils: spatulas, ladles, tongs, and whisks
Measuring tools: cups, spoons, and thermometers
Knives: if they are not stored on a magnetic strip or in a knife block
Small tools: peelers, graters, and can openers
Miscellaneous or rarely used items
Items that should not be in the kitchen at all
That last category is usually larger than expected.
Kitchen drawers often become a default landing zone for batteries, rubber bands, random hardware, takeout menus, and expired coupons.
Remove all of it.
Step 2: Assign Drawers by Use Frequency
The most important decision in kitchen drawer organization is deciding which drawer gets which category.
Use a simple rule:
The more often you use something, the closer it should be to where you use it.
Prime Drawer — Closest to the Prep Area or Stove
Store everyday cutlery and the 3–4 cooking utensils you use most frequently.
Secondary Drawer — Within Arm's Reach
Store the rest of your cooking utensils, measuring cups, and measuring spoons.
Third Drawer
Use this for knives, if they are stored in drawers, along with specialized tools and infrequently used items.
Most kitchens have 3–5 drawers. If you have more, assign the extras to non-tool storage, such as kitchen linens, plastic bags, foil, and food wrap.
Step 3: Choose the Right Dividers
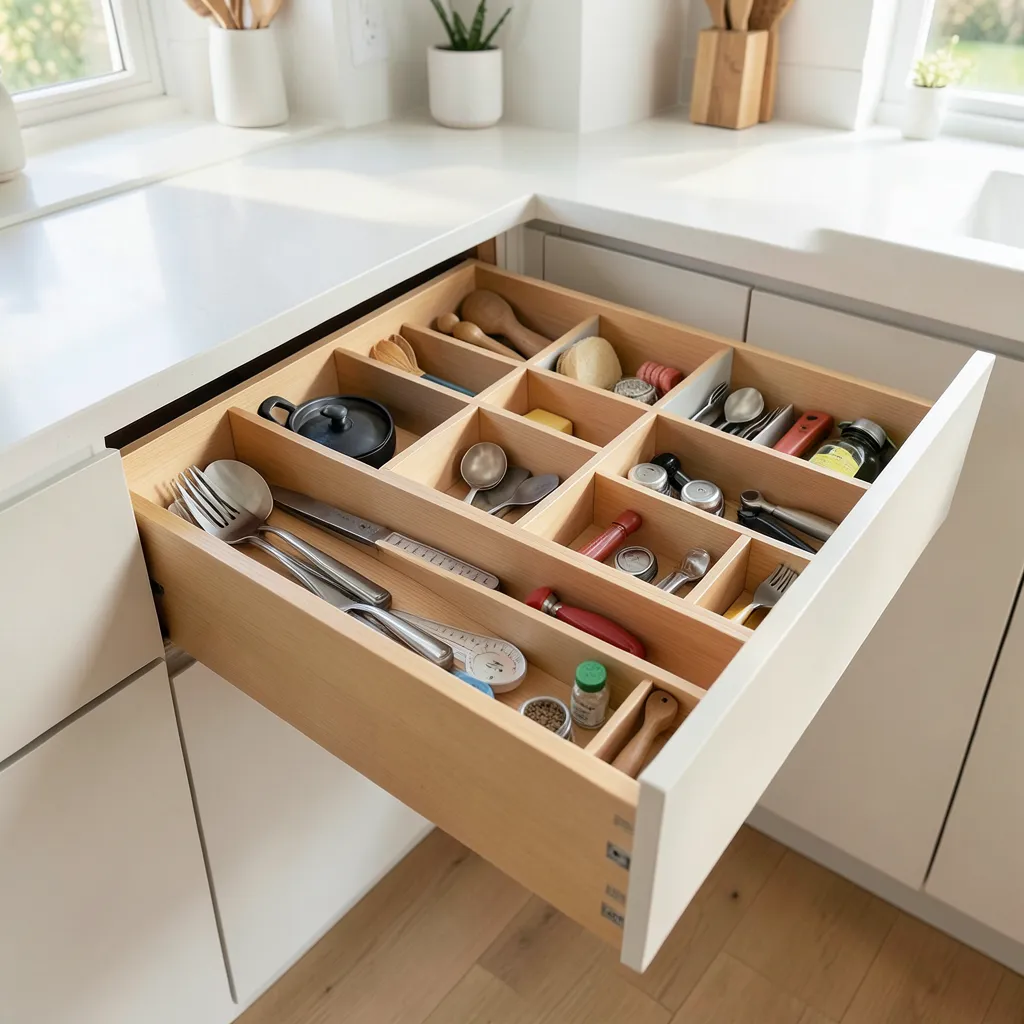
Drawer dividers come in three main types, each with different advantages and disadvantages.
Fixed-Slot Organizers
Usually made from bamboo or plastic, these are the most common option. Their fixed dimensions mean they either fit your drawers well or leave unused gaps.
They work particularly well for cutlery drawers, where the categories are predictable.
Adjustable or Expandable Dividers
These use spring-loaded rails that expand to fill the drawer width.
They are more flexible than fixed organizers but can shift over time unless they are properly secured.
They are a good choice for deeper drawers containing items of different sizes.
Individual Bins
These are small, separate containers arranged inside the drawer.
They offer maximum flexibility but require careful sizing to prevent the containers and their contents from shifting when the drawer is opened and closed.
Important: Measure your drawers before buying anything.
Check the width, depth, and available height.
Step 4: The Vertical Cooking Utensil Drawer
Most kitchen drawers store cooking utensils flat, stacked on top of one another.
A better approach is to store them vertically, standing upright in a deep drawer or in a section with a tall enough divider.
Vertical storage allows you to see all your utensils at once without digging through a pile.
It also makes better use of the available space.
A drawer that holds six utensils when they are stored flat may be able to hold 10–12 when they are stored vertically.
If you do not have a drawer deep enough for vertical storage, a countertop utensil holder near the stove can achieve a similar result while freeing the drawer f
Decluttering is not about minimalism or getting rid of everything you own. It is about making intentional decisions about what belongs in your home. This room-by-room method helps you make those decisions quickly and stick with them.
Most closet organization projects fail within three months. This guide explains why — and how to build a system based on your actual wardrobe that holds up long-term.
A linen closet stuffed with falling towels and mismatched sheets is one of the most frustrating storage problems in any home. This guide builds a functional system for bedding, towels, and the overflow items that tend to accumulate in linen closets.